一.关于Spring Boot的配置 Spring Boot 对于开发人员最大的好处在于可以对 Spring 应用进行自动配置。Spring Boot 会根据应用中声明的第三方依赖来自动配置 Spring 框架,而不需要进行显式的声明。比如当声明了对 HSQLDB 的依赖时,Spring Boot 会自动配置成使用 HSQLDB 进行数据库操作。
** 注意,自动配置永远是第二位的,一旦你配置自己的东西,那自动配置的就会被覆盖。**
Spring Boot如何处理多配置 在应用中管理配置并不是一个容易的任务,尤其是在应用需要部署到多个环境中时。通常会需要为每个环境提供一个对应的属性文件,用来配置各自的数据库连接信息、服务器信息和第三方服务账号等。通常的应用部署会包含开发、测试和生产等若干个环境。不同的环境之间的配置存在覆盖关系。Spring Boot 提供了一种统一的方式来管理应用的配置,允许开发人员使用属性文件、YAML 文件、环境变量和命令行参数来定义优先级不同的配置值。
命令行参数。
通过 System.getProperties() 获取的 Java 系统参数。
操作系统环境变量。
从 java:comp/env 得到的 JNDI 属性。
通过 RandomValuePropertySource 生成的1random.*1属性。
应用 Jar 文件之外的属性文件。
应用 Jar 文件内部的属性文件。
在应用配置 Java 类(包含@Configuration注解的 Java 类)中通过@PropertySource注解声明的属性文件。
通过SpringApplication.setDefaultProperties声明的默认属性。
Spring Boot 的这个配置优先级看似复杂,其实是很合理的。比如命令行参数的优先级被设置为最高。这样的好处是可以在测试或生产环境中快速地修改配置参数值,而不需要重新打包和部署应用。
SpringApplication 类默认会把以“–”开头的命令行参数转化成应用中可以使用的配置参数,如 “–name=Alex” 会设置配置参数 “name” 的值为 “Alex”。比如在启动一个Spring Boot项目的时候使用java -jar ${项目名}.jar --server.port=9090命令,则该项目的端口就被设置成了9090.
二.属性(properties)文件配置 属性文件是最常见的管理配置属性的方式。Spring Boot 提供的 SpringApplication 类会搜索并加载 application.properties 文件来获取配置属性值。SpringApplication 类会在下面位置搜索该文件。
1. 当前目录的“/config”子目录。
2. 当前目录。
3. classpath 中的“/config”包。
4. classpath
上面的顺序也表示了该位置上包含的属性文件的优先级。优先级按照从高到低的顺序排列。
对于配置属性,可以在代码中通过“@Value”注解来使用,这点和普通的Spring项目一样。如下例:
pom.xml文件中引入Spring Boot Parent和Spring Boot Web的依赖:
1 2 3 4 5 6 7 8 9 10 11 12 13 14 15 16 17 <parent > <groupId > org.springframework.boot</groupId > <artifactId > spring-boot-starter-parent</artifactId > <version > 1.5.7.RELEASE</version > <relativePath /> </parent > <dependencies > <dependency > <groupId > org.springframework.boot</groupId > <artifactId > spring-boot-starter-web</artifactId > </dependency > <dependency > <groupId > com.google.code.gson</groupId > <artifactId > gson</artifactId > <version > 2.8.0</version > </dependency > </dependencies >
在resources目录下创建一个名为application.properties 的文件,将如下内容添加至该文件:
1
2
3
4
book.name =HongLouMeng book.author =曹雪芹 book.publisher =\u4e09\u8054\u51fa\u7248\u793e book.price =68.5
创建启动类:
1
2
3
4
5
6
7
8
9
10
11
12
13
14
package com.ddcx.springboot.democonfig;import org.springframework.boot.SpringApplication;import org.springframework.boot.autoconfigure.SpringBootApplication;@SpringBootApplication public class ConfigDemoApplication { public static void main (String[] args) { SpringApplication.run(ConfigDemoApplication.class, args); } }
再创建一个controller类,在这个类中就可以通过@Value从配置文件中获取配置好的值:
1
2
3
4
5
6
7
8
9
10
11
12
13
14
15
16
17
18
19
20
21
22
23
24
25
26
27
28
29
30
31
32
33
package com.ddcx.springboot.democonfig.controller;import com.ddcx.springboot.democonfig.entity.Book;import com.google.gson.Gson;import com.google.gson.GsonBuilder;import org.springframework.beans.factory.annotation.Autowired;import org.springframework.beans.factory.annotation.Value;import org.springframework.web.bind.annotation.RequestMapping;import org.springframework.web.bind.annotation.RestController;@RestController public class DemoController { @Value("${book.name}") private String bookName; @Value("${book.author}") private String bookAuthor; @Value("${book.publisher}") private String publisher; @Value("${book.price}") private String price; @RequestMapping("/bookInfo") String bookInfo () { return "bookName-->" + bookName + "\nbookAuthor-->" + bookAuthor + "\npublisher-->" + publisher + "\nprice-->" + price ; } }
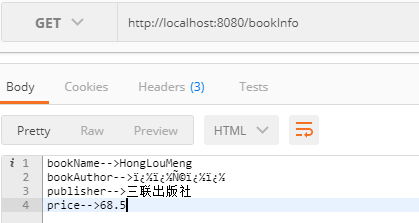
在postman中发送请求得到如下结果:
properties文件中的中文出现了乱码问题,可以在properties文件中改用unicode编码的方式。
除此之外,还可以配置服务器端口、数据库等各种配置:
1
2
3
4
5
# 配置服务器端口为8090 server.port=8090 # 配置应用的根路径,必须以'/'开头,否则会报异常: # java.lang.IllegalArgumentException: ContextPath must start with '/ and not end with '/' server.context-path=/demo-config
除了使用@Value注解绑定配置属性值之外,还可以使用@ConfigurationProperties(prefix="book")注解,配置属性中以“book”为前缀的属性值会被自动绑定到 Java 类中同名的属性上,前提是要有属性的set方法。这种方法可以方便地配置数据库。
在这个示例中比如创建一个Book类:
1
2
3
4
5
6
7
8
9
10
11
12
13
14
15
16
17
18
19
20
21
22
23
24
25
26
27
28
29
30
31
32
33
34
35
36
37
38
39
40
41
42
43
44
45
46
47
package com.ddcx.springboot.democonfig.entity;import org.springframework.boot.context.properties.ConfigurationProperties;import org.springframework.stereotype.Component;@Component @ConfigurationProperties(prefix="book") public class Book { private String name; private String author; private String publisher; private double price; public String getName () { return name; } public void setName (String name) { this .name = name; } public String getAuthor () { return author; } public void setAuthor (String author) { this .author = author; } public String getPublisher () { return publisher; } public void setPublisher (String publisher) { this .publisher = publisher; } public double getPrice () { return price; } public void setPrice (double price) { this .price = price; } }
在前面缩写的DemoController中自动注入一个Book属性,添加如下代码:
1
2
3
4
5
6
7
8
private static Gson gson = new Gson ();@Autowired private Book book;@RequestMapping("/prefixConfigTest") String prefixConfigTest () { return gson.toJson(book); }
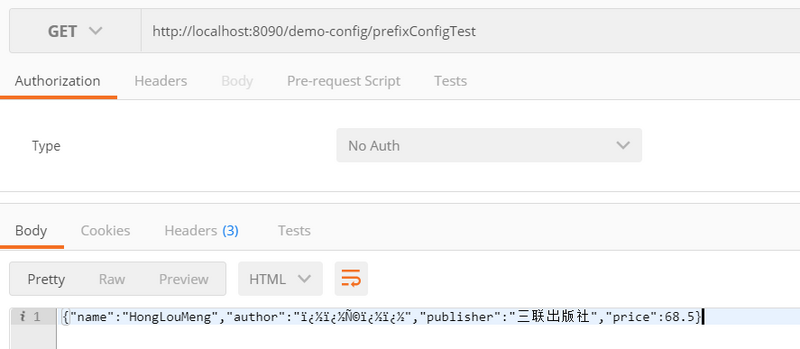
在postman中测试表明也可以获取到application.properties中的配置,并且服务器的端口配置也可以同时得到验证:
SpringBoot 如何更改默认配置文件的名称 前面讲到,默认情况下SpringBoot 会去指定的路径下搜索文件名称为 application.yml、application.properties的配置文件,那如何自己定义配置文件名?
在SpringBoot中可以通过“spring.config.name”配置属性来指定不同的属性文件名称。也可以通过“spring.config.location”来添加额外的属性文件的搜索路径。如果应用中包含多个 profile,可以为每个 profile 定义各自的属性文件,按照“application-{profile}”来命名。
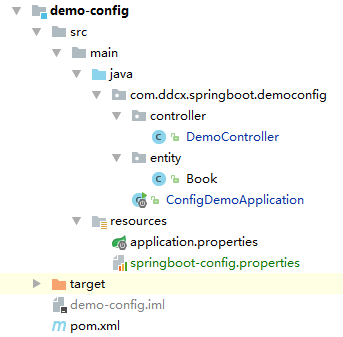
接下来可以实际操作一下,首先在resources目录下再创建一个 springboot-config.properties 的文件,
1
2
3
4
5
book.name=Effective Java book.author=Joshua Bloch server.port=8070
在将启动类的启动方式改成如下:
1
2
3
4
5
6
7
8
9
10
11
12
13
14
15
16
17
18
19
package com.ddcx.springboot.democonfig;import org.springframework.boot.SpringApplication;import org.springframework.boot.autoconfigure.SpringBootApplication;import org.springframework.boot.builder.SpringApplicationBuilder;@SpringBootApplication public class ConfigDemoApplication { public static void main (String[] args) { new SpringApplicationBuilder (ConfigDemoApplication.class) .properties("spring.config.location=classpath:/springboot-config.properties" ) .run(args); } }
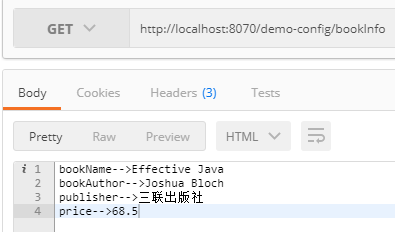
访问结果:
这里会有一个现象,如果 application.properties 和 springboot-config.properties 两个文件同时存在,当application.properties中的配置在pringboot-config.properties也同样配置了,比如上面的bookName,那么pringboot-config.properties中的配置优先级更高,当application.properties中的配置在pringboot-config.properties没有配置,那么application.properties中的那项配置仍然会起作用,比如上面的publisher和server.context-path等。但是如果将 application.properties文件名改成其它的,比如 application-config.properties,则完全以springboot-config.properties这个配置文件为准。
## 三.YAML配置文件
除了属性文件,SpringApplication 类也提供了对 YAML 配置文件的支持,下面给出了 application.yml 文件的示例。
注意:使用.yml时,属性名的值和冒号中间必须有空格,如branch: master正确,branch:master就是错的。
1
2
3
4
5
6
7
8
9
10
11
user: username: 张三 age: 22 contactAddress[0]: province: hunan city: changsha area: yuhuaqu contactAddress[1]: province: guangdong city: guangzhou area: tianhequ
SpringBoot的配置支持嵌套和几何配置,对于上面的配置,对应如下User和Address两个类:
1
2
3
4
5
6
7
8
9
10
11
12
13
14
15
16
17
18
19
20
package demoyaml.entity;import org.springframework.boot.context.properties.ConfigurationProperties;import org.springframework.stereotype.Component;import java.util.List;@Component @ConfigurationProperties(prefix = "user") public class User { private String username; private Integer age; private List<Address> contactAddress; }
1
2
3
4
5
6
7
8
9
10
11
12
13
package demoyaml.entity;public class Address { private String province; private String city; private String area; }
在Controller中添加访问这个配置的user对象的方法:
1
2
3
4
5
6
7
8
9
10
11
12
13
14
15
16
17
18
19
20
21
22
23
24
25
package demoyaml.controller;import com.google.gson.Gson;import demoyaml.entity.User;import org.springframework.beans.factory.annotation.Autowired;import org.springframework.boot.autoconfigure.EnableAutoConfiguration;import org.springframework.web.bind.annotation.RequestMapping;import org.springframework.web.bind.annotation.RestController;@RestController public class DemoController { private static Gson gson = new Gson (); @Autowired private User user; @RequestMapping("/getUser") String getUser () { return gson.toJson(user); } }
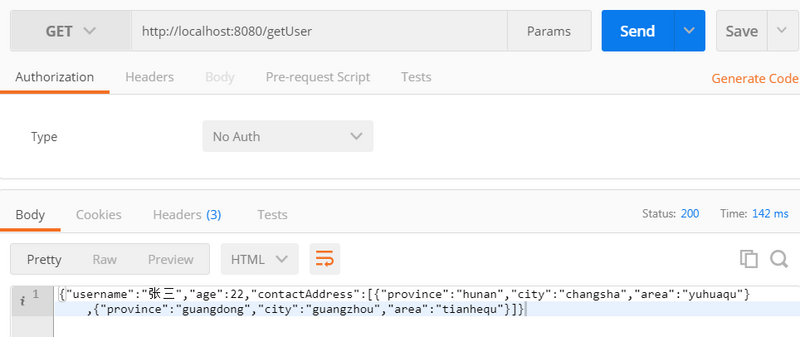
访问结果:
注意事项 进制数的转换 场景:
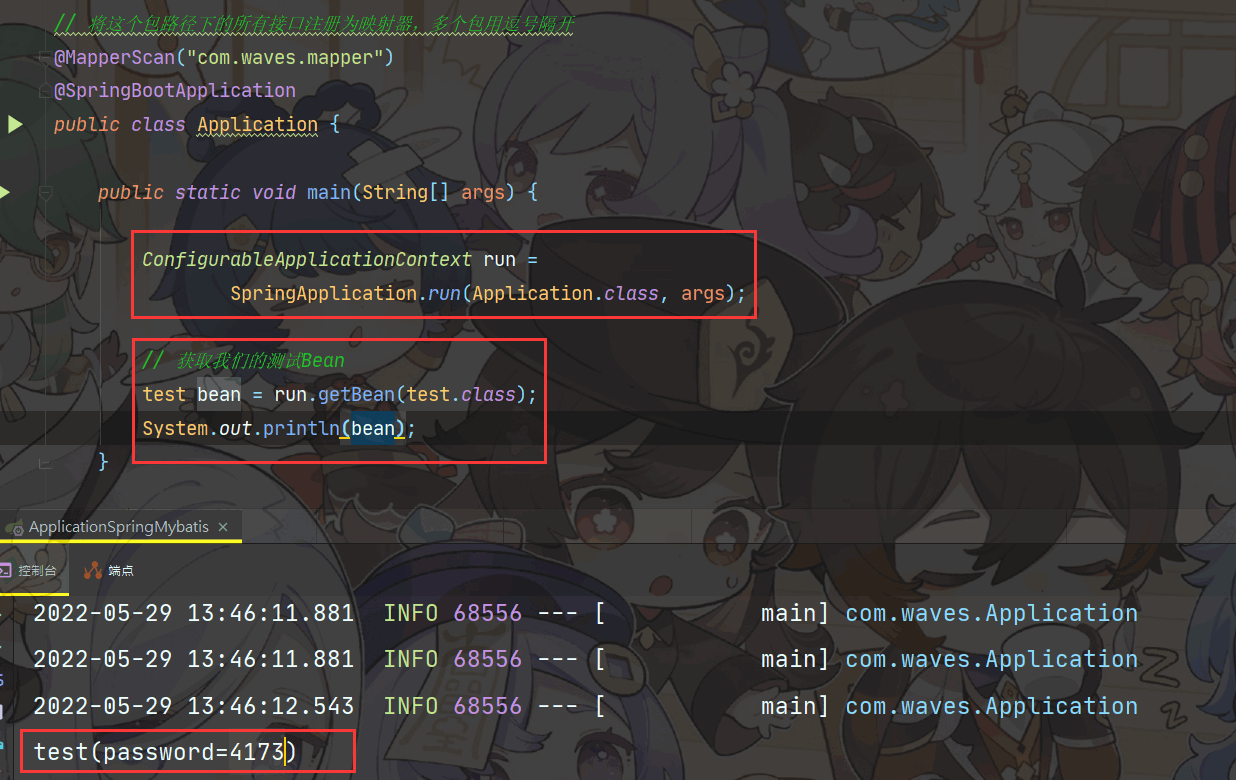
打印结果
为什么配置文件中明明写的是 010115,为什么打印出来是4173呢?
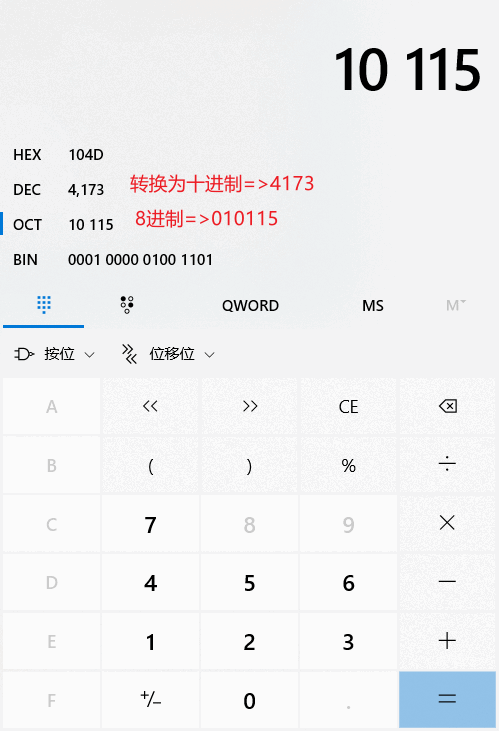
打开windows系统的计算器,就知道为什么010115 会变成 4173 了。
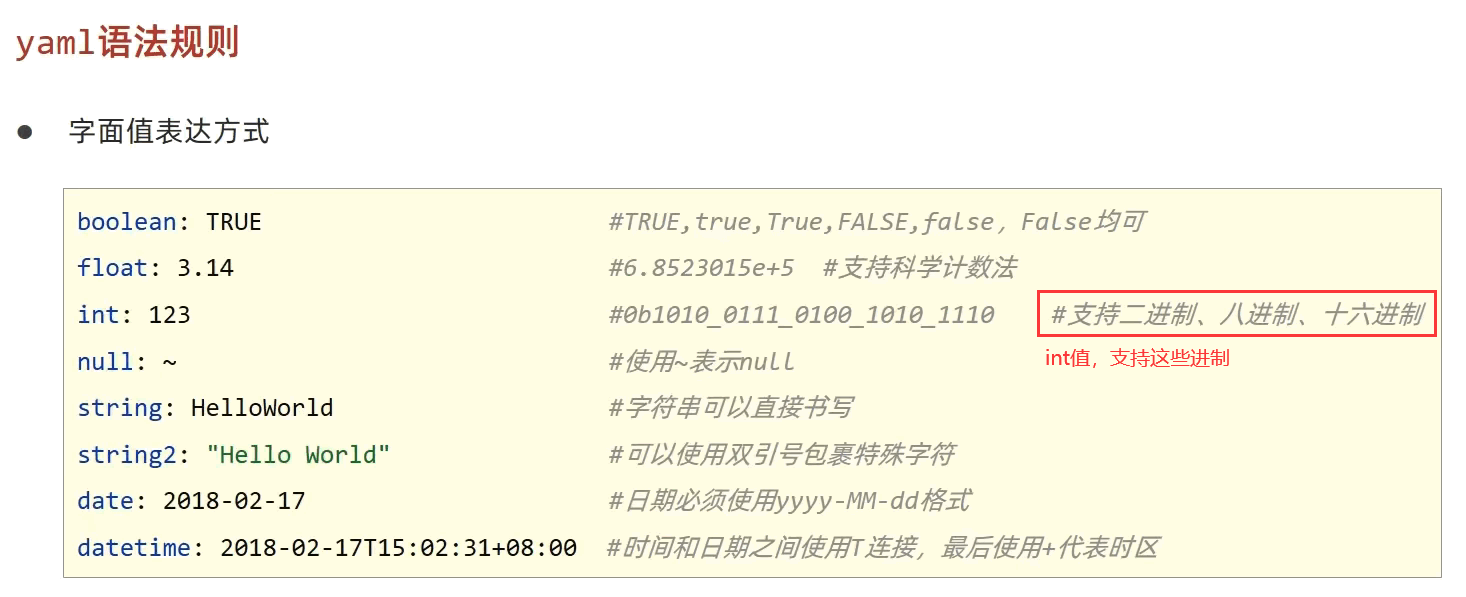
因为配置的密码刚好是以0开头的,然后又恰好后面的数字都只包含0-7,他是一个标准的八进制,所以这个数值就被自动转换成了8进制的值。
四.多环境配置 在实际开发中,通常会有开发、测试、生产等多种环境,SpringBoot是怎么来配置多种环境的呢?
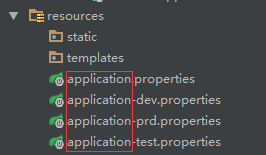
1.properties多环境配置 (1)在项目中添加不同环境的配置文件
(2)在application.properties配置文件中配置需要激活那个环境:
1
2
3
4
#激活哪一个环境的配置文件 spring.profiles.active=dev #公共配置 spring.jackson.date-format=yyyy-MM-dd HH:mm:ss:
2.yaml多环境配置 在application中增加内容:
1
2
3
4
5
6
7
8
9
10
11
12
13
14
15
16
17
18
19
20
#激活哪一个环境的配置文件 spring: profiles: active: development --- spring: profiles: development db: url: jdbc:hsqldb:file:testdb username: dev password: dev #在配置文件增加三个短横线区分不同的环境 --- spring: profiles: test db: url: jdbc:mysql://localhost/test username: test password: test
定义一个DBConfig类,获取激活的那个环境的配置:
1
2
3
4
5
6
7
8
9
10
11
12
13
14
15
16
17
18
19
20
21
22
23
24
25
26
27
28
29
30
31
32
33
34
35
36
37
38
package demoyaml.entity;import org.springframework.boot.context.properties.ConfigurationProperties;import org.springframework.stereotype.Component;@Component @ConfigurationProperties(prefix = "db") public class DBConfig { private String url; private String username; private String password; public String getUrl () { return url; } public void setUrl (String url) { this .url = url; } public String getUsername () { return username; } public void setUsername (String username) { this .username = username; } public String getPassword () { return password; } public void setPassword (String password) { this .password = password; } }
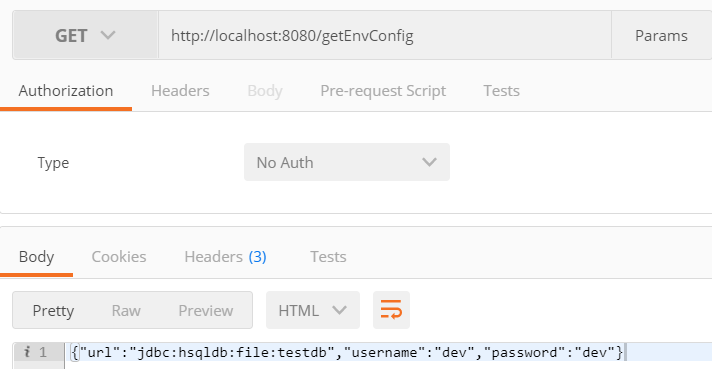
通过controller中的方法查看:
1
2
3
4
5
6
7
8
9
10
11
12
13
14
15
16
17
18
19
20
21
22
23
24
25
package demoyaml.controller;import com.google.gson.Gson;import demoyaml.entity.DBConfig;import org.springframework.beans.factory.annotation.Autowired;import org.springframework.boot.autoconfigure.EnableAutoConfiguration;import org.springframework.web.bind.annotation.RequestMapping;import org.springframework.web.bind.annotation.RestController;@RestController public class DemoController { private static Gson gson = new Gson (); @Autowired private DBConfig DBConfig; @RequestMapping("/getEnvConfig") String getDBConfig () { return gson.toJson(DBConfig); } }
3.两种配置方式的比较
Properties配置多环境,需要添加多个配置文件,YAML是即可以把不同环境配置写在一个文件,也可以写多个配置文件。
书写格式的差异,yaml相对比较简洁,优雅
YAML的缺点:不能通过@PropertySource注解加载。如果需要使用@PropertySource注解的方式加载值,那就要使用properties文件。
本节示例代码已上传到GitHub: https://github.com/liaosilzu2007/spring-boot.git